Watch the Video:
Mountain bikers love to upgrade their suspension, and it’s easy to hit checkout on a brand new shock before doing your homework and laying the groundwork to make sure you can actually bolt your new shock to your bike. Mounting hardware sits in the eyelet of your shock, and adapts your shock to your bike. For a big ‘ol deep dive on mounting hardware, check out this super in depth mounting hardware blog we made a few years ago! All that information is still correct, and in this blog here, we’re not going quite as deep. Instead, we’re just hitting exactly what you need to know to get your new shock up and running.
Before buying your new shock, step one is figuring out your plan for mounting hardware. It’s not complicated, but you need to make a plan before your shock shows up so you don’t have to order more parts and wait even longer to ride your new shock. Your two options are either reusing the hardware from your previous shock or buying new hardware for your new shock. Both options have their pros and cons, and each option makes sense for different riders. With that being said, we generally recommend getting new hardware for your new shock, but let’s look at option one to see if that’s right for you!

No matter your shock brand, you've gotta make a plan.
Option one: Reusing your old hardware
The best part about reusing your old hardware is that it’s guaranteed to fit your bike. There’s no stress of figuring out the right spec or making sure that you’re ordering the exact right part number. I mean, you’ve been riding it, so it has to be right, right? Removing mounting hardware is much trickier than installing mounting hardware, kind of like how it’s always easier to climb up a tree than to climb down it. Luckily, if you’ve got the right tools for the job, it’s no big deal to pop those suckers out and get them ready for your new shock. Exactly which tools you need depends on your specific situation, so let’s look at some different situations!

Tools of the trade
All riders will need the Fox Mounting Hardware Removal Tool, and some will also need the RockShox DU Bushing Removal Tool. If you’re sticking with the same brand of shock, whether it’s Fox, RockShox, or anything else, then all you need is the Fox Mounting Hardware Removal Tool. I know it’s a Fox product, but it will allow you to press out the mounting hardware of any brand of shock, as they’re all a standardized size. To use the tool, you’ll need a sturdy workbench to press against, and it holds the mounting hardware just right so it can slide out of the shock’s eyelet. Keep track of all the pieces that you just pressed out, they’re all an important part of the puzzle!
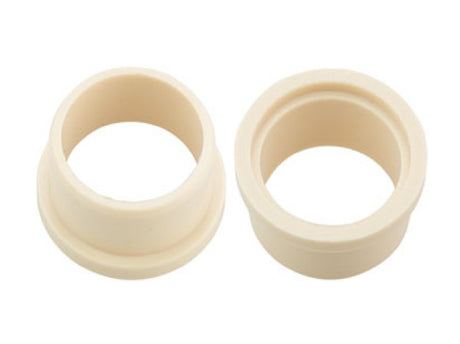
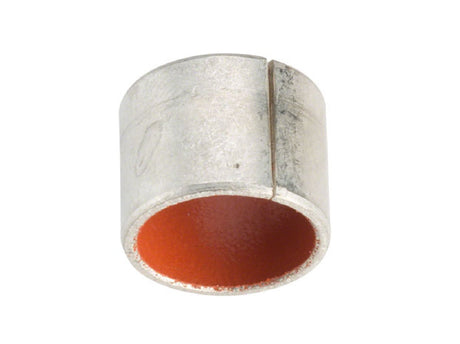
You’ll notice that once you’ve pressed the hardware out, there’s still something left in the eyelet of the shock. Depending on which style of mounting hardware you have, it will either be a cream colored IGUS bushing or a metal DU bushing. All Fox shocks come with IGUS bushings pre-installed, and RockShox shocks come with DU bushings pre-installed. Fox and RockShox have their own styles of mounting hardware that have slightly different designs, and each require the correct bushing in the eyelet of the shock. Fox uses IGUS bushings, and RockShox uses DU bushings.

If the new shock that you’re upgrading to is the same brand as your old shock, then you’ve already got the correct bushings in the shock’s eyelets, and you can press the mounting hardware in by hand. Because the mounting hardware isn’t brand new, it shouldn’t be too tricky to get it in there, and pushing with your fingers should do the trick. Don’t be afraid to use that sturdy bench again if it’s fighting you though.
Riders who want to find out if the grass really is greener and decide to swap brands from Fox to RockShox or vice versa will need to purchase the RockShox DU Bushing Removal Tool in addition to the Fox Mounting Hardware Removal Tool. While the soft Fox IGUS bushings are easy enough to carefully pry out with a flathead screwdriver, RockShox’s metal DU bushings need a little more umph to unseat, and the specialty tool really is necessary for this job. You’ll need two 13mm wrenches to bring it to life, and then it’s quite easy to pop the little DU bushing out!
If you’re going from a Fox shock to RockShox, you can push the IGUS bushing and Fox hardware into the RockShox eyelet by hand with the help from your sturdy bench. But if you’re installing RockShox hardware into a Fox shock, you’ll need to use a vice to punch that DU bushing into its Fox eyelet forever home. But now you’re all set to bolt your shock to your frame and go hit the trails!
Option two: Getting new hardware
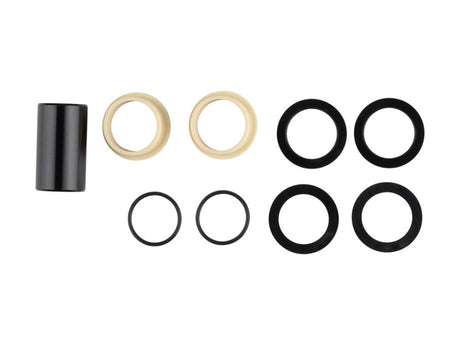
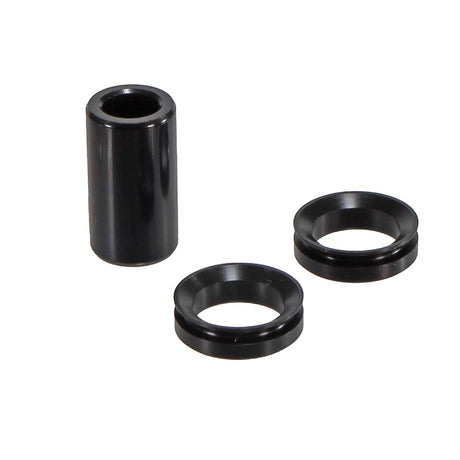
Surprisingly, it’s generally more affordable to buy new hardware than reuse hardware, and that’s just because those specialty tools are a little pricey. New hardware costs about $20 per eyelet, and it’s way easier to just install mounting hardware than remove it first and then install it. But that’s only true if you match your mounting hardware brand to your shock brand. Both Fox and RockShox make their own styles of mounting hardware, and while each is compatible with the other brand, keeping it in the family keeps it tool free.

The most crucial step in getting the correct mounting hardware for your bike is figuring out your specific mounting hardware spec. Some manufacturers post this in the detailed specs of their bike, while others hide it away deep in the user manual, and there are some brands that don’t make it publicly available at all. Luckily, our Mounting Hardware Database is a compilation of mounting hardware specs for the majority of popular bikes out there, making things easy for you! Just find your exact model and generation of bike, and write down the mounting hardware spec that’s listed on that site. Then head over to the product page for either Fox or RockShox Mounting Hardware and select the corresponding size.
For those of you with a Giant or a Canyon or any other brand that’s not listed there, you’ve got a couple options. Number one is reaching out directly to either a distributor of that brand or the brand itself to hopefully get some information right from the source. Oftentimes this is easier said than done. Number two is doing it the old fashioned way, and measuring the mounting hardware on your old shock. Your old shock has the correct size mounting hardware in there, so we can reverse engineer the specs with just a couple measurements. We’ve got a super detailed video that breaks down exactly how to get these measurements, and it’s not that tricky when you follow all the steps.
Once you’re done ordering and everything shows up at the door, pressing the mounting hardware in is easy as can be, and won’t take any special tools. Unless you count the trusty sturdy workbench as a tool, because you’ll need to leverage to jam them into place.
Conclusion
While mounting hardware isn’t the most exciting or glamorous subject in the world, it’s still step one of upgrading your mountain bike shock, otherwise you’ll end up with an expensive shock that’s as useful as a door stop. Give us a call or send us an email if you’re still confused, and we can definitely help you out!