Intro
In this video, Mike shares some new shop projects and shows some fancy mountain bike in the repair stands. In BJ's stand is a nice Transition Spur getting some service and upgrades. Meanwhile, Alex is working on a Transition Patrol which is getting a fork and shock service, linkage service, and lots of brake work.
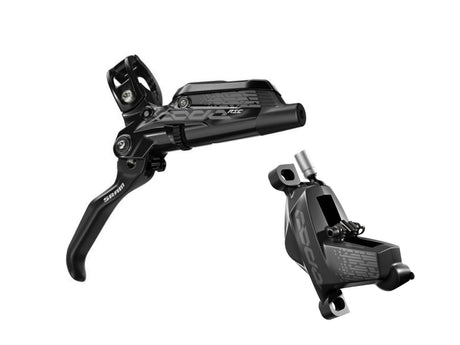
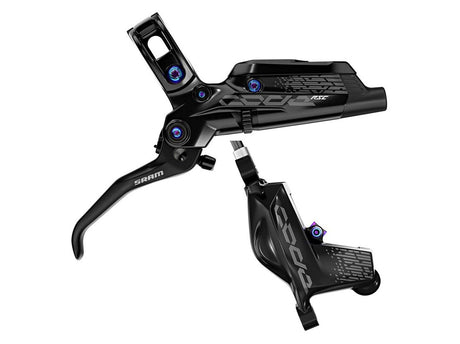
In this video we’ll be walking through the pad replacement procedure on SRAM Code or G2 brakes, with the help of our professional mechanic Alex who has bled approximately 1,000,000 brakes in their 13 years as a professional mechanic.
Most riders (and even mechanics) will simply push the pistons in and install new pads into the caliper. However, the proper method for changing brake pads is to open the master cylinder and clean the pistons before pushing them back into the caliper. Also, you'll need to check your rotors and resurface them with sandpaper and clean them with isopropyl alcohol to create a fresh braking surface for the new brake pads to bed in.
Before you replace your brake pads, you will need to get the material of pads best fit for you and your riding style. Organic? Metallic? Semi-Metallic? Or Ceramic?
If you just want to learn how to replace your brake pads, skip to 9:58
Steps For Replacing SRAM Code Break Pads At Home
-
Remove wheel and old brake pads
-
Attach syringe at top of system
-
Push pistons out to expose them and clean with isopropyl alcohol
-
Exercise pistons
-
Push pistons in
-
Insert new brake pads
-
Resurface rotor
-
Reinstall wheel/rotor
-
Squeeze the lever a few times with pad contact all the way “in”
-
Take the syringe off and replace screw
Tips When Replacing Break Pads
-
Open brake system at the lever
-
Exercise and clean pistons before installing new pads
-
Resurface your rotor with sand paper
-
Wind your contact adjust all the way in
Replacing Brake Pads On SRAM Code or G2 brakes
Mountain bike brakes are incredibly strong and have lots of power when you’re yanking on them on trail, but are very delicate when it comes to working on them, so follow these steps to keep your brakes safe and make them feel dialed in on trail. Brake pads are one of the most commonly replaced wear items on our bikes so let’s help you replace them correctly!
1. Remove Old Wheel and Old Pads
The first step is fairly obvious and hard to mess up, that’s removing your wheel and old brake pads to make room for the fresh ones, but there are a few steps before throwing those in! This is where lots of home mechanics skip a few steps, and because there is more material on the new pads, we need to depressurize the hydraulic system to make room for those thicker pads.
2. Prepare Lever and Put On Syringe
Set your brake lever level with the ground, open up that bleed port, and screw on your Bleeding Edge syringe with air bled out of the fluid so we don’t immediately introduce air into the system. Screwing on the syringe allows the fluid in your system to move around, which is important because we have to push the pistons back into the caliper to make room for the fresh pads, and without opening up room for the fluid when you push the pistons, you’d overpressurize your system and potentially have a serious problem on your hands!
3. Expose and Clean Pistons, Exercise Pistons, Push Pistons In,
Now that you can freely move the pistons, extend them a bit by pumping up the lever, exposing their sides. Be careful not to push them all the way out, and clean around the sides of them with q-tips and isopropyl alcohol. Give the pistons and caliper body a thorough cleaning, and then push the pistons back in with a plastic tire lever or something else soft. You don’t want to lubricate the pistons, just make sure that they’re clear of all debris and they should slide smoothly through the caliper.
4 & 5. Exercise Pistons, Push Pistons In
Double check that all the pistons extend uniformly when pushing the lever, and keep exercising them until all pistons are moving in unison. Exercising the pistons lubricates the seals with dot fluid and can help move bubbles that have gotten trapped behind them. Ease the pistons back into the caliper.
6. Insert New Pads
Leave the syringe on the lever, and while there shouldn’t be any brake fluid anywhere on the caliper, double check that it’s fully clean before installing the new brake pads. The last thing we want is to immediately contaminate the fresh pads, so it’s worth doing one final wipe down before putting the fresh meat in there.
7. Resurface Rotor
Before reinstalling the wheel and brake rotor, we need to prepare the rotor for the new pads.
First, check if the rotor needs to be replaced because of wear or any discoloration from excess heat. If there’s a noticeable step in the rotor between the braking surface and the arms of the rotor then it’s probably time for that rotor to move on to the bin, or if there’s a colorful glaze across the rotor that’s a sign of excess heat and you should probably size up to a bigger disc!
If neither of those two are the case, then it’s time to clean up your rotor to get it ready for the new pads. That means sanding it down with sand paper to clean up the braking track and let the new pads deposit some material and mate with the rotor. Even if you’re replacing your pads with the same model, this is still a super important step that will ensure that you get maximum braking power after bedding in those new pads!
Finishing Touches
Now that everything in the rear end is back together, let’s go back up to that lever with the syringe hanging off it. It’s time to give it a light squeeze to make sure the system is topped off, but don’t push too hard or else you’ll overpressurize the system and get yourself into trouble! Then unthread the syringe and you are good to go! Make sure to give everything a thorough clean up and it’s time to hit the trails!